Saturday, June 29, 2013

Vellum Flowers and Butterflies- Another Floral Birthday :-)

Hi Stampers!!

I hope all of you are having a great weekend so far!! I understand today is Canada Day- so happy Canada Day to all of my Canadian friends!!  

I wanted 
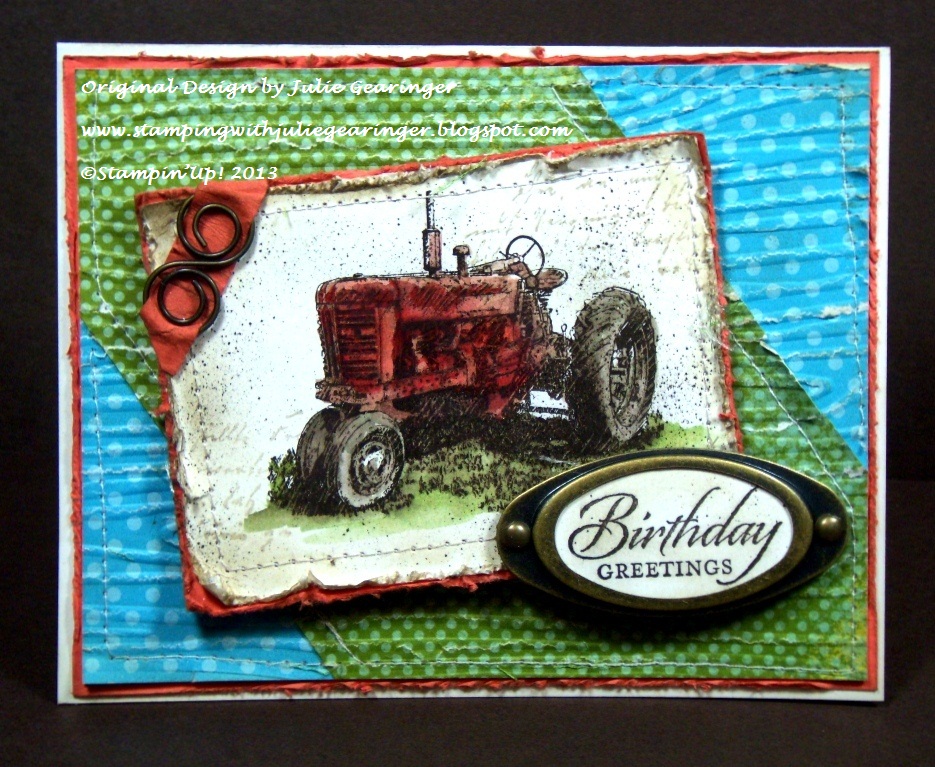
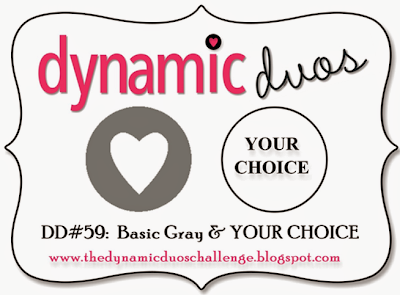
to create a card with this week’s DD59 Dynamic Duo Challenge Colors (Basic Gray and you pick the second color) and I decided to choose Pink Pirouette.  I have a great friend who just loves pink and loves to stamp, so whenever I can I try to use pink for her :-).

If you have had the chance to visit the Dynamic Duos, try to stop by sometime this week- they always have a number of entries plus they have a wonderful Design Team!!  Again, tremendous inspiration!!

To create this card:

Repeatedly stamp the flowers from Flower Shop and butterfly from Papillon Potpourri using Basic Gray Classic Ink onto Vellum (I have not used Vellum in a while and love this technique). 

Once the ink has dried, flip the image over onto the Stampin’ Pierce™ Mat (this mat is not only great for paper piercing but also for stamping and this vellum technique).  Use a stylus and gently rub the stylus over all of the white areas in the flower images and butterflies.

Use the Pink Pirouette Stampin’ Write marker to add a bit of pink to back of the blossoms (to appears as though they are dogwood blossoms) and also to the back of the butterflies (you are coloring over the area that you just rubbed the stylus). 

If desired, add a bit of Pink Pirouette to the front of the blossoms as well.  Punch out the butterflies using the Elegant Butterfly Punch and hand cut the flowers (you could use the Pansy Punch but you will have a border around the edge when using the punch). 

Ink the blossom stamp from Blooming with Kindness using Pink Pirouette ink and stamp onto a piece of Whisper White cardstock.

Use the Big Shot™ and one of the Deco Labels Framelits™ to cut a frame from the Bloomin’ with Kindness image and also cut another frame the same size from Basic Gray cardstock.  Cut the Basic Gray frame in half horizontally and trim the edges so only the top portion shows as a frame behind the focal image.  

Stamp the sentiment from Wetlands (love these sentiments) using Basic Gray Classic Ink directly onto the Deco Label image.

Use the Big Shot™ with the Framed Tulips Textured Impressions™ Embossing Folder to emboss a piece of Whisper White cardstock and trim the outside edge a bit.  Layer this onto Basic Gray cardstock and again onto Pink Pirouette.

Adhere a piece of Basic Gray Designer Series Paper (I used a piece from a retired Level I Hostess Pack) and add the layered Deco Label with Stampin’ Dimensionals®.  Adhere the vellum flowers and butterflies using Mini Glue Dots, add the Pearls to the butterflies and ribbon at the top to finish off the card.  

Stamp Sets:  Flower Shop, Blooming with Kindness, Papillon Potpourri, Wetlands

Ink: Basic Gray, Pink Pirouette, Stampin’ Write Marker- Pink Pirouette

Paper: Whisper White, Basic Gray, Pink Pirouette, retired Basic Gray DSP

Accessories:  Big Shot™, Framed Tulips Textured Impressions™ Embossing Folder, Deco Labels Framelits™, Elegant Butterfly Punch,Stampin' Pierce Mat, Stylus, Pearls, Basic Gray ribbon (from my stash)


Thanks again for stopping by- I hope you have a great weekend!!

Friday, June 28, 2013

Thinking of You- Feathers for Friday :-)

Hi Stampers! 

Happy Friday!!   I wanted to create a card for this week’s FMS92 Freshly Made Sketches and the curving lines of the sketch seemed to be perfect for feathers.   

If you have a chance, check out their sire- the Design Team is fabulous and they always have a number of entries that show the variety of ways to use a sketch!

To create this card:

Using Early Espresso Classic Ink, stamp the peacock feather image onto Whisper White cardstock and color with an AquaPainter™ and using ink from the Summer Starfruit, Gumball Green, Pacific Point, Pool Party and Soft Suede Classic Ink pads.  Once dry, fill in a bit with Stampin’ Write markers in the same colors.

To add a bit of iridescence to the feathers, brush  Moonlight Smooch™ Pearlized Accent Ink (retired but on the Clearance Rack) over the feather.  Carefully cut out the feather images, cutting into the sides a bit to create the "wisps" and give a realistic appearance to the feather.

Once cut out, spray with Champagne Mist Shimmer Paint spray (paint mixed with 70% rubbing alcohol) to give more iridescence.

Use the Big Shot™ along with the Adorning Accents Framelits™ to cut the wavy edge to a piece of Whisper White cardstock and emboss with the Stripes Textured Impressions™ Embossing Folder.  Align the feathers along the wavy edge and add the sentiment.

Trying to capture the iridescence- not easy with the camera :-)
Add the embossed panel (this was a previous piece that I had embossed using the Honeycomb Textured Impressions™ Embossing Folder (inking the interior first with Sahara Sand Classic Ink) and sprayed with Champagne Mist Shimmer Paint spray. 

Add the ½” Pool Party Seam Binding triple ribbon bow and adhere to the front of the Whisper White card base.  Add the feather layer to finish off the card.

Stamp Sets:  Fine Feathers, Wetlands   

Ink: Early Espresso, Gumball Green, Pacific Point, Pool Party, Sahara Sand, Soft Suede Summer Starfruit, Stampin’ Write markers also in these colors

Paper: Whisper White, Early Espresso

Accessories:  Big Shot™, Honeycomb and Stripes Textured Impressions™ Embossing Folders, Adorning Accents Framelits™, Large Oval Punch, AquaPainter™, ½” Pool Party Sean Binding Ribbon, Moonlight Smooch™ Pearlized Paint (retired), Champagne Mist Shimmer Paint (retired)

 I am not sure if this card would be considered “clean” enough for the challenge but I had a great time creating it!!    Thanks again for stopping by- I hope all of you have a great Friday!!

Thursday, June 27, 2013

Mosaic Miss You- Two Challenges in One!

Hi Stampers!!

I wanted to create a card with this week’s  CQC195 ColourQ Challengecolors along with the Splitcoaststampers SC442 Sketch Challenge (if you have not had the chance to do so, check out both sites for terrific examples of how colors and sketches can be so versatile)!!


To create this card:

Stamp the medallion image from Lovely Romance using Basic Gray Classic Ink twice onto Whisper White cardstock.  Color using Stampin’ Write markers in Pool Party, Summer Starfruit and Orchid Opulence (retired) and “fussy cut” the interior oval out of one of the images.  Use the Big Shot™ with the smallest Deco Labels Framelit™ to cut out the other image. 

Use the Big Shot™ and the same size Deco Labels Framelit™ as above to cut another frame out of Basic Gray cardstock- cut this frame in half horizontally and trim the edges so only the top portion shows as a frame behind the focal image. 

Punch a circle from Basic Gray cardstock using the 1 ¾” Circle Punch and cut this in half- layer behind the focal image on the sides.  Add the “fussy cut” oval using Stampin’ Dimensionals®. 

Stamp the sentiment from Lacy & Lovely using Basic Gray Classic Ink onto Whisper White cardstock- use the 1” Square Punch to create the banner points and layer onto Basic Gray cardstock.

Use the Big Shot™ along with the Modern Mosaic Textured Impressions™ Embossing Folder to emboss a piece of Summer Starfruit Designer Series Paper (I used a retired piece from Patio Party)- lightly sand with the Sanding Block.

Mount the Basic Gray cardstock to a Whisper White card base, add the embossed piece of Summer Starfruit DSP and the Paper Tea Lace Doily (cut in half).  Add the sentiment to cover the cut edge of the doily, adhere the focal image using Stampin’ Dimensionals® and the Pearl to the center to finish off the card.

Stamp Sets:  Lovely Romance, Lacy & Lovely

Ink: Basic Gray, Stampin’ Write Markers- Pool Party, Summer Starfruit and Orchid Opulence (retired)

Paper: Whisper White, Basic Gray, Patio Patio DSP (retired)

Accessories:  Big Shot™, Modern Mosaic Textured Impressions™ Embossing Folder, Deco Labels Framelits™, 1” Square Punch, 1 ¾” Circle Punch, Tea Lace Paper Doily, Sanding Block, Pearl


Thanks again for stopping by- I hope you have a wonderful Thursday!!

Wednesday, June 26, 2013

Watercolor Leaves- A Fun Masking Technique


Hi Stampers! 

I wanted to create a card for this week’s JAI160 Just Add Leaves Challenge and use the Dynamic Duos DD58 Color Challenge as well.  If you have not had a chance, stop by and check out both challenge sites- great inspiration by all!!

I wanted to try a masking/watercoloring technique and play around with the new hostess set, Simply Sketched.  I decided to just let go and have fun!!

To create this card:

Using Early Espresso Classic Ink, stamp the leave image onto Whisper White cardstock and also onto a sticky note (for the mask).  Carefully cut out the leaf image from the sticky note and use this as a mask to repeatedly stamp the image onto the Whisper White cardstock, re-stamping each time into the Early Espresso Classic Ink.

Using Stampin’ Write markers in Tangerine Tango and Cajun Craze, color the leaves and berries.  Use the AquaPainter™ and pick up some of the Tangerine Tango Classic Ink from the ink pad and paint around the leaves, dropping water onto the paper and smearing the ink from the markers.  Remember- this part will make it look like you have made a mistake, but just let the water flow and have fun!!

Once dry, re-color the leaves and berries with the markers again, add a bit of distressing with the Color Spritzer Tool and the same two markers (I know, the Spritzer Tool has retired but I still love it!).  Once completely dry, add the White Gel Pen accents.

Use the Big Shot™ with the Deco Labels Framelits™ to cut out the focal image and also cut out another piece from Cajun Craze cardstock.  Cut the Cajun Craze frame in half horizontally and adhere behind the focal image. 

Use the Big Shot™ with the Woodgrain Textured Impressions™ Embossing Folder to emboss a piece of Whisper White cardstock.

Mount the focal image using Stampin’ Dimensionals® and add the 5/8” Satin Ribbon bow (from my stash) and adhere to the Cajun Craze card base layer.

Stamp the butterflies using Cajun Craze Classic Ink onto Vellum paper.  Using a Stylus along with the Stampin’ Pierce Mat, run the Stylus over the back of the butterflies to create the white areas.  

Punch the butterflies out with the Elegant Butterfly Punch and on the reverse side (the same side that you used the Stylus, color with the Tangerine Tango Stampin’ Write marker). 

Add the butterflies and sentiment to the card using Mini Glue Dots- add the Pearls to finish off the card.

Stamp Sets:  Simply Sketched, Papillon Potpourri, Teeny Tiny Wishes  

Ink: Early Espresso, Cajun Craze, Tangerine Tango, Stampin’ Write Marker- Cajun Craze, Tangerine Tango

Paper: Whisper White, Cajun Craze, Vellum 

Accessories:  Big Shot™, Woodgrain Textured Impressions™ Embossing Folder, Deco Labels Framelits™, Elegant Butterfly Punch, Word Window Punch, Pearls, White Gel Pen, Color Spritzer Tool (retired), 5/8” Satin Ribbon (from my stash)


Thanks again for stopping by- I hope all of you have a wonderful Wednesday!!

Tuesday, June 25, 2013

SC250 Honeycomb Birthday

Hi Stampers! 

I wanted to play with the new hostess set, Postage Collection and decided to use the Splitcoaststampers SC250 Sketch Challenge (this was an older sketch challenge but that is what I love about Splitcoaststampers Challenges- you can go back and review and do them whenever you like :-))  I hope to take the time to go back and complete a card for each sketch and color challenge one day :-)

To create this card:

Use the Big Shot™ along with the Woodgrain Textured Impressions™ Embossing Folder to emboss a piece of Soho Subway Designer Series Paper and adhere to a piece of Early Espresso cardstock. 

Also emboss a piece of So Saffron cardstock using the Hexagon Textured Impressions™ Embossing Folder (ink the smooth surface of the embossing folder with Sahara Sand Classic Ink prior to embossing).   Cut along the edges by hand and adhere to the center of the background panel.

Ink the wreath stamp and the bee from Postage Collection using Early Espresso Classic Ink and stamp onto Whisper White cardstock.  Color the bee with Stampin’ Write markers in So Saffron and Pool Party and the wreath with Gumball Green.

Punch the wreath/bee image out with the 1 ¼” Circle Punch and sponge Sahara Sand Classic Ink over the edges.  Mount onto circles punched from Early Espresso cardstock using the 1 3/8” Circle Punch.

Another view trying to get a glimpse of the Shimmer Paint :-)
Add the Paper Tea Lace Doily and the bee circle images using Stampin’ Dimensionals® and add the ½” Early Espresso Quilted Satin Ribbon Bow (retired) to the top of the card.

Stamp the sentiment from Wetlands using Early Espresso Classic Ink onto Whisper White cardstock, add the bee image and cut the banners using a 1” Square Punch.  Mount onto Early Espresso cardstock and adhere to the card front.

Add the Pearls and spray the entire card with Champagne Mist Shimmer Paint (retired as well) to give a bit of shimmer (you cannot see the shimmer in the photograph but it is there).

Stamp Sets: Postage Collection (hostess set), Wetlands

Ink: Early Espresso, Sahara Sand; Stampin’ Write Markers- So Saffron, Pool Party, Gumball Green

Paper/Cardstock:  Whisper White, Early Espresso, Sahara Sand

Accessories: Big Shot™,  Textured Impressions™ Embossing Folders- Woodgrain and Honeycomb, Punches- 1 ¼” and 1 3/8” Circle, 1” Square; Paper Tea Lace Doily, Pearls, Sponge Dauber, 1/2” Early Espresso Quilted Ribbon (retired), Champagne Mist Shimmer Paint Spray (mixed with 70% alcohol-paint also retired)


Thanks again for visiting- I hope you have a wonderful Tuesday!!

Sunday, June 23, 2013

PP151- A Thank You for The Paper Players

Hi Stampers! 

I wanted to create a card for The Paper Player’s PP151 Sketch Challenge and decided to use some of my retired Designer Paper stash along with retired ribbon- I have so much of both in my stamping (craft) room that it would be a shame not to use it :-)  Of course, the items can be substituted with current product as well :-)

Again, if you have a chance, check out their Design Team samples and other entries- they are the best!!
                                                                                               
To create this card:

Cut several pieces of the Designer Series Paper (I used the retired International Bazaar) and attach to a piece of Whisper White cardstock.  I decided to sew around the edges (love my new little sewing machine) and then emboss using the Big Shot™ and the Square Lattice Textured Impressions™ Embossing Folder.  Trim the edges so the Whisper White base does not show.

Stamp the coral image from By The Tide using Tangerine Tango Classic Ink onto a piece of Whisper White cardstock.  Also stamp the script image using Island Indigo Classic Ink, punch out the image with the 2 1/2” Circle Punch and adhere a circle of Island Indigo behind the image.

Adhere the coral image to the card using Stampin’ Dimensionals™, add the Tea Lace Paper Doily along with the sentiment (punched out using the Decorative Label Punch). 

Stamp the seahorses using Island Indigo Classic Ink as well as the Nantucket images.  Apply a bit of Frost White Shimmer Paint to the seahorses to add a bit of iridescence.  Use the ¾” Circle Punch to punch the Nantucket image out and layer behind ¾” Circles of Island Indigo cardstock (layer two to “peek” out behind the main image).

Add the 5/8” Early Espresso Satin Ribbon triple bow along with the seahorses, Nantucket images and Antique Brad.

Adhere the entire panel to a piece of Early Espresso cardstock and mount onto a piece of Whisper White card base.

Add the Pearls to the corners to finish off the card.

Stamp Sets: By The Tide, Wetlands

Ink:  Island Indigo, Tangerine Tango

Paper: Whisper White, Early Espresso, Island Indigo, International Bazaar Designer Series Paper (retired)

Accessories:  Big Shot™,  Square LatticeTextured Impressions™ Embossing  Folder, Punches-3/4” Circle, 2 ½” Circle,  Decorative Label, Antique Brad, 5/8” Early Espresso Satin Ribbon, Pearls, Frost White Shimmer Paint (retired)


Thanks again for stopping by – I hope you have a wonderful Sunday!!

Friday, June 21, 2013

Patchwork Birthday- Two Challengers in One!


Hi Stampers!  

Happy Friday everyone!!  I wanted to create a card using the fabulous PPA161 Pals Paper Arts Sketch along with the bright "summery" colors in this week’s CQC194 ColourQ Challenge.   If you have the time and have not already done so, check both sites out for wonderful inspiration!!

I finally had a chance to sew on my card!! :-)  FYI- Recently I purchased a small inexpensive sewing machine for sewing just on cards (since I did not want to use my heavier machine) and I was able to use it for the first time on this card  :-))

To create this card:

Using Early Espresso Classic Ink, stamp the tractor image onto Whisper White cardstock.  Use the AquaPainter™ to pick up ink from Calypso Coral for the tractor and Gumball Green for the grass area. 

Highlight the tractor with the retired Poppy Parade Stampin’ Write marker, distress the edges using the Distressing Tool and a Sponge Dauber with Sahara Sand Classic Ink. 
Stamp the script stamp from Notable Notions using Sahara Sand Classic Ink and stamp into the background area around the tractor.  Use the Color Spritzer Tool (retired) with the Early Espresso Stampin’ Write marker to add a bit more detail.

Sew the distressed focal image onto a piece of Calypso Coral cardstock and also distress the edges with the Distressing Tool, Sponge Dauber as noted above. 

Ink the sentiment with Early Espresso Classic Ink and stamp onto Whisper White cardstock.  Punch out using the Large Oval Punch and add a bit of Sahara Sand Classic Ink with the Sponge Dauber and add a bit of distressing with the Color Spritzer Tool (retired) with the Early Espresso Stampin’ Write marker.

Use the Big Shot™ with the Woodgrain Textured Impressions™ Embossing Folder to emboss a piece of Gumball Green and Tempting Turquoise Designer Series Paper (DSP) .

Use the sewing machine to sew the layers onto a piece of Whisper White cardstock and once sewn, distress the edges slightly (be careful since the paper can tear easily).

Adhere this sewn layer to a piece of Calypso Coral cardstock and mount onto the Whisper White card base (use the Sponge Dauber with Sahara Sand to tone down the white edges of the card base).

Mount the tractor image using Stampin’ Dimensionals®, add the sentiment with the retired Antique Brass Hodgepodge Hardware along with the corner detail created from Calypso Coral cardstock scrap with additional Antique Brass Hodgepodge Hardware to finish off the card. 

Stamp Sets:  Harvest Blessings, Wetlands  

Ink: Early Espresso, Calypso Coral, Gumball Green, Stampin’ Write Markers- Early Espresso, retired Poppy Parade

Paper: Whisper White, Calypso Coral, Designer Series Paper- Gumball Green, Tempting Turquoise

Accessories:  Big Shot™, Woodgrain Textured Impressions™ Embossing Folder, Large Oval Punch , Distressing Tool, Sponge Daubers, Color Spritzer Tool (retired), Antique Brass Hodgepodge Hardware (retired), Sewing Machine


Thanks again for stopping by- I hope all of you have a wonderful day and God Bless!!

Walk on the Wild Side- A Watercolor Birthday :-)


Hi Stampers!  


I hope all of you are having a wonderful week so far! This past weekend, while I had the new set, Walk in the Wild and along with the 2013-2015 In Colors out, I  decided to create a masculine card using the Moose image.  I am so thrilled with the realistic art forms in this set :-)!  


I also incorporated a modified version of the Splitcoaststampers SC440 Sketch (added a central panel - hope that was OK) :-)


To create this card:

Using Early Espresso Classic Ink, stamp the Moose image onto Whisper White cardstock.  Using the AquaPainter™, pick up ink from Coastal Cabana for the sky, Baked Brown Sugar for the Moose and Pistachio Pudding for the grass.
  
Use the Distressing Tool to distress the edges and with Sponge Daubers, apply Baked Brown Sugar Classic Ink along with a bit of Early Espresso Classic Ink to the edges.  Adhere to a piece of Early Espresso cardstock and distress the edges as well.  Use the Color Spritzer Tool along with an Early Espresso Stampin’ Write marker to add a bit more distressing. 

Use the Big Shot™ with the Woodgrain Textured Impressions™ Embossing Folder to emboss a piece of Baked Brown Sugar cardstock. 

Ink the smooth interior of the Woodgrain Textured Impressions™ Embossing Folder and emboss a piece of Coastal Cabana cardstock.  Cut this embossed piece into thirds and add one third at the top of the Early Espresso card base and the other third at the bottom (save the extra piece for another card later).

Add the knotted Hemp Twine (retired) to the embossed Baked Brown Sugar layer and add this to the card base.   Adhere the Moose focal image using Stampin’ Dimensionals®. 

Stamp the sentiment onto Whisper White cardstock, punch out with the Large Oval Punch, distress and sponge the edges, spritz with the marker as above and add to a piece of Early Espresso cardstock punched with the Artisan Label Punch to finish off the card.

Stamp Sets:  Walk in the Wild, Wetlands

Ink: Early Espresso, Baked Brown Sugar, Cool Cabana, Pistachio Pudding,  Stampin’ Write Early Espresso marker

Paper: Whisper White, Baked Brown Sugar, Cool Cabana, Early Espresso

Accessories:  Big Shot™, Woodgrain Textured Impressions™ Embossing Folder, Large Oval Punch , Artisan Label Punch, Distressing Tool, Sponge Daubers, Color Spritzer Tool (retired), Hemp Twine (retired)


Thanks again for stopping by- I hope all of you have a great Friday!!

Thursday, June 20, 2013

A Simply Sketched Sympathy Card

Hi Stampers!!

This card was created for the CCMC257 Create with Connie and Mary Sketch Challenge- again, this is one of my favorite weekly challenges and if you have not had the chance to do so, check out their site for wonderful inspiration!!

I had fun with this sketch and decided to flip it upside down :-)

To create this card:

Stamp the bird image from the hostess set, Simply Sketches (love this set!) onto Whisper White cardstock using Early Espresso Classic Ink. 

Use the AquaPainter™ to watercolor using So Saffron , Pistachio Pudding and Cool Cabana Classic Ink.  Cut out with the Big Shot™ and the Ovals Collection Framelits™ and using a Sponge Dauber, apply Baked Brown Sugar Classic Ink along the edges. 

Cut another oval using the same size Oval Framelit™ from So Saffron cardstock and using scissors, cut across the center horizontally and adhere behind the focal image. 

Use the Big Shot™ along with the Deco Label Framelits™ to cut out a piece of Early Espresso cardstock.  Punch a piece of embossed Pool Party cardstock using the Decorative Label Punch (cut this in half vertically to layer onto the Deco Label frame).

Adhere a piece of Epic Day Designer Series Paper (DSP) to a piece of Early Espresso cardstock and add the vertical piece of Early Espresso embossed cardstock.

Stamp the sentiment from Teeny Tiny Wishes using Early Espresso Classic Ink, add the decorative labels and bird image along with the ½” Pool Party Seam Binding Ribbon along with the Naturals button to finish off the card.

Stamp Sets:  Simply Sketched, Teeny Tiny Wishes

Ink: Early Espresso, So Saffron, Pistachio Pudding, Cool Cabana, Baked Brown Sugar

Paper: Whisper White, Early Espresso, So Saffron, Pool Party, Epic Day DSP

Accessories:  Big Shot™, Fancy Fan and Woodgrain Textured Impressions™ Embossing Folders, Ovals Collection and Deco Labels Framelits™, Sponge Dauber, Decorative Label Punch, ½” Pool Party Seam Binding Ribbon, Naturals Buttons


Thanks again for visiting- I hope you have a fantastic Friday!!

Nautical Thinking of You


Hi Stampers!!

This card was created for the Nacho Average NAC51 Sketch Challenge  and the SR181 Stampin' Royalty Theme Challenge.  I love the nautical look and was fortunate to be use up some of my retired Nautical Designer Specialty Paper (DSP) along with a few other retired items :-)  If you have not already either site yet, check out the Design Team samples as well as the other entries- such great inspiration!   

To create this card:

Cut the banners from various pieces of DSP and create the banner points with the 1” Square Punch. 

Use the  Big Shot™ with the Square Lattice Textured Impressions™ Embossing Folder to emboss a piece of Smoky Slate cardstock and mount onto a piece of Early Espresso cardstock and add the banners across the upper portion. 

Mount the map piece of DSP over the top of the banners and adhere a scrap piece of Early Espresso cardstock to cover the rough edges and sponge a bit of Soft Suede Classic Ink to distress the map a bit.
 
Stamp the sentiment using Early Espresso Classic Ink onto Whisper White cardstock and punch out using the Large Oval Punch and add a bit of Soft Suede Classic Ink to distress the Whisper White cardstock.   Using the Large Oval Punch and punch out two additional ovals- one from Early Espresso cardstock and another from Nautical DSP.   

Cut the additional ovals in half and adhere behind the sentiment. Add the knotted Hemp Twine with the Pewter Hodgepodge Hardware (both retired) and sentiment to finish off the card.

Stamp Sets:  Wetlands

Ink: Early Espresso, Soft Suede

Paper: Whisper White, Early Espresso, Smoky Slate, retired Nautical DSP  

Accessories:  Big Shot™, Square Lattice Textured Impressions™ Embossing Folder, Sponge Dauber, Large Oval Punch, 1” Square Punch, retired Hemp Twine, retired Pewter Hodgepodge Hardware


Thanks again for visiting- have a terrific Thursday!!
Related Posts Plugin for WordPress, Blogger...